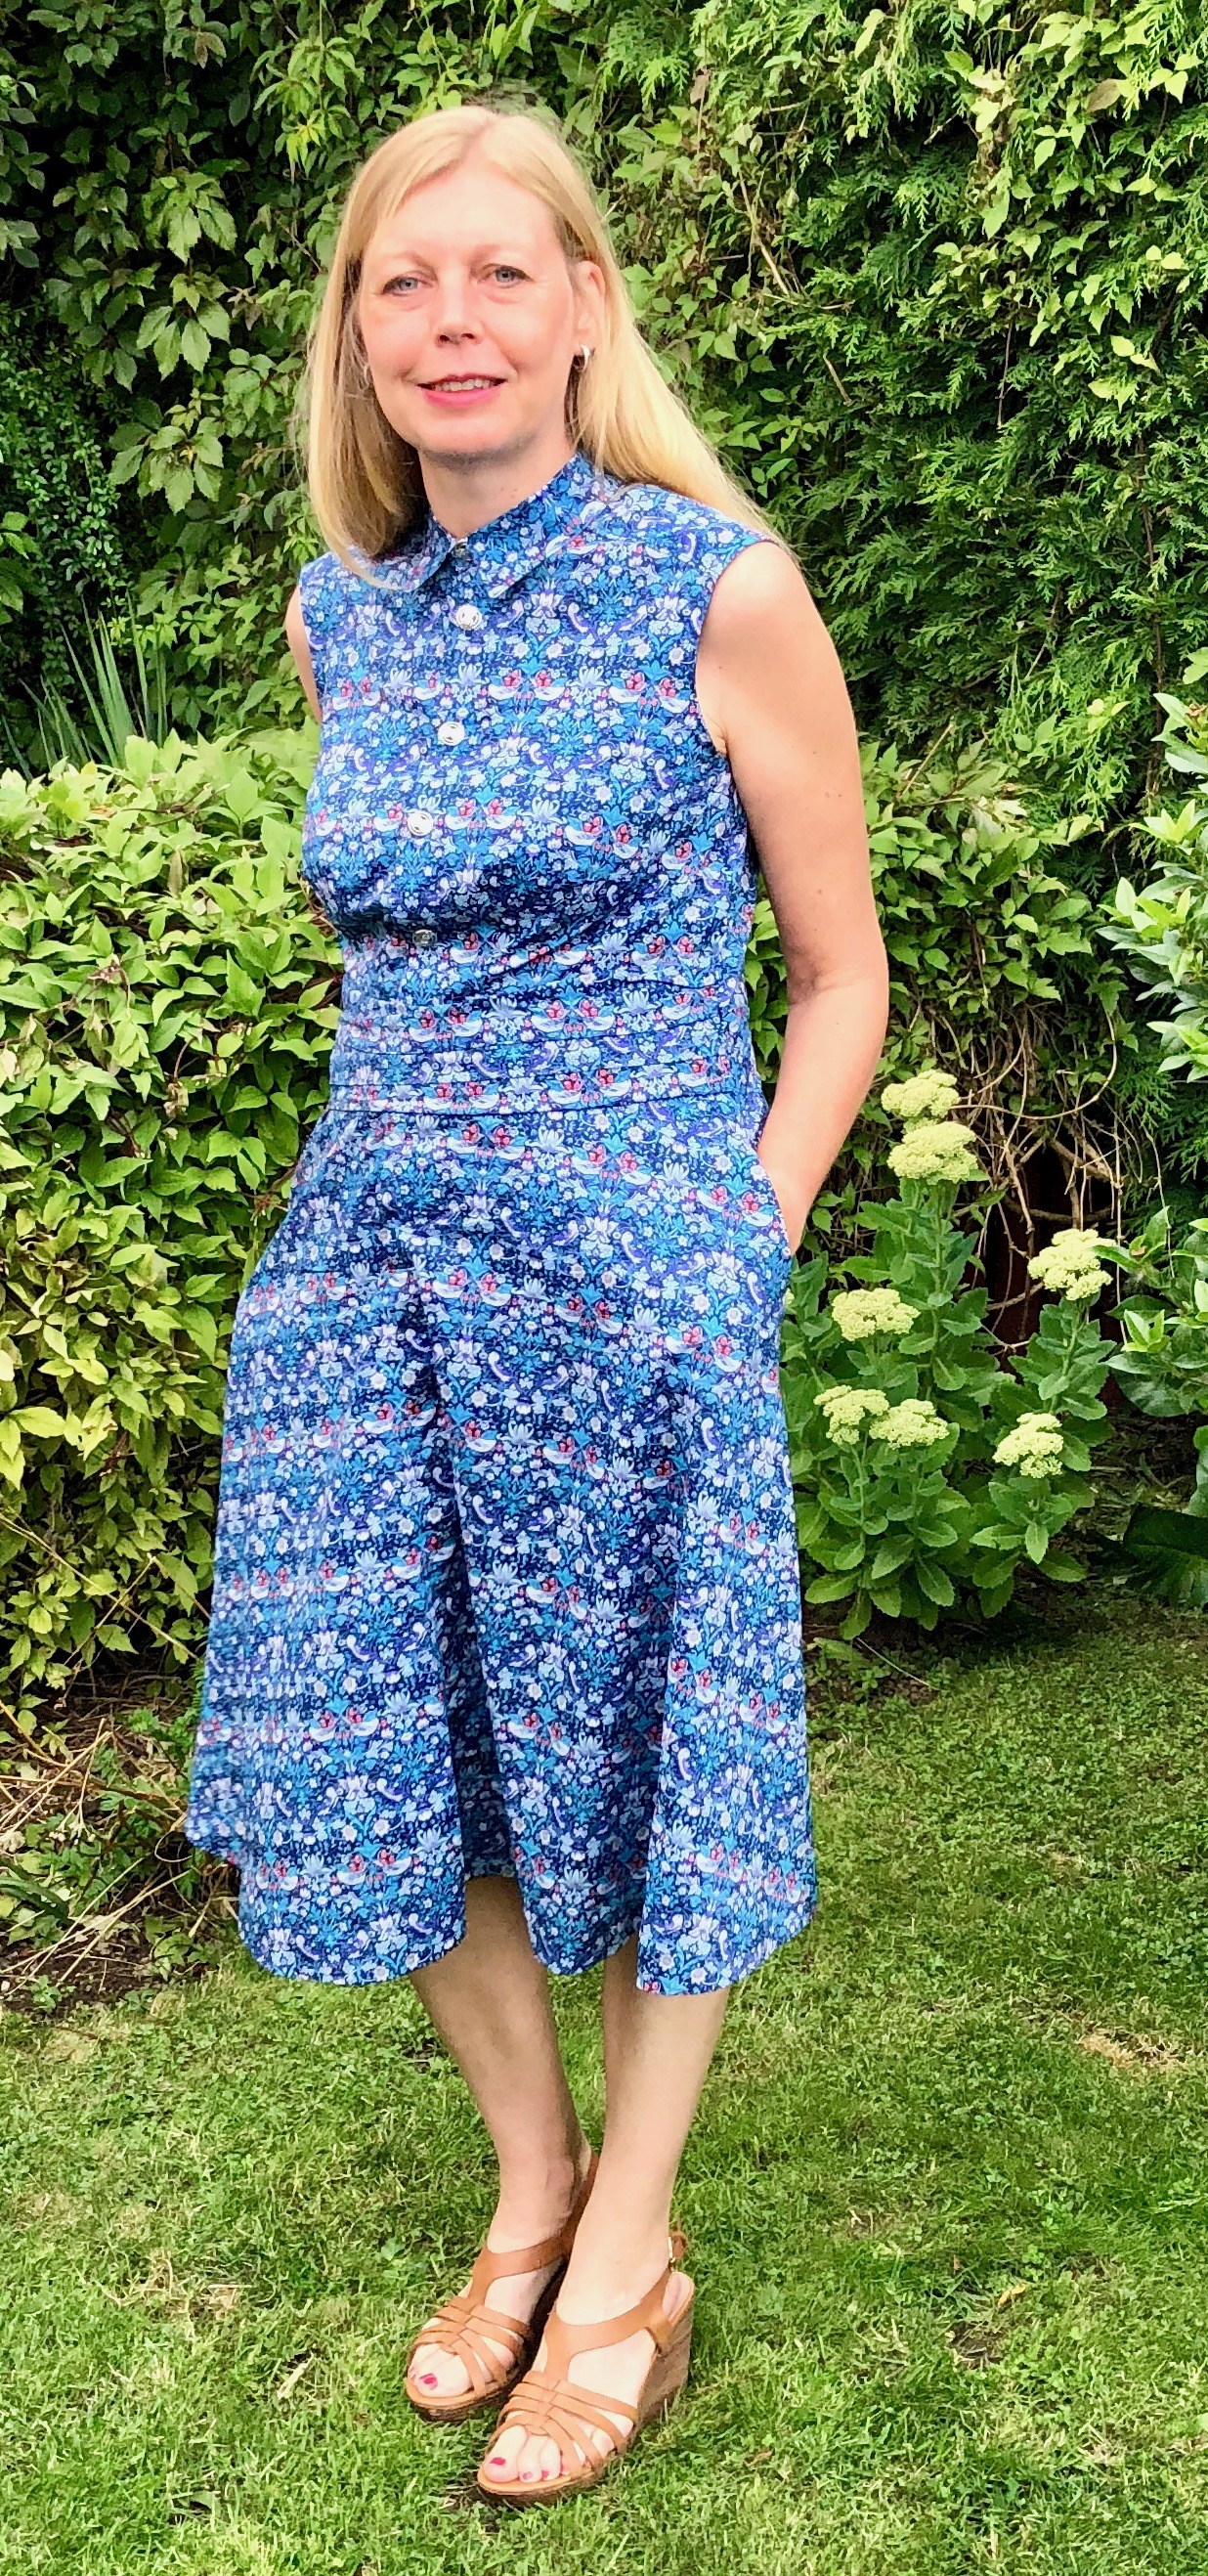
The final project on my make 9 list for 2019 was the Penny dress by Colette, a calf length shirt dress with 2 options; Version 1 with a short sleeve, gathered skirt & fitted waistband & Version 2 with a sleeveless bodice, semi-circle skirt & an overlapping, gathered waist belt. I’d had the pattern printed off last November by Patternsy & can highly recommend their service, there are a lot of pages to stick together, as both versions have 2 separate pieces for the front skirt. I had bought the fabric from Fabworks, 3 metres of a cotton linen blend that I had ordered online & I had a deadline, my son’s wedding celebration in the Yorkshire Dales on August 10th, so what was stopping me?

Fabric
Well to start with the fabric never seemed right for this project, I imagined it to be much lighter weight than it turned out to be & I was never confident that it would be right for this pattern, I love it but I think it would be more suitable as a jacket. With the wedding looming I looked at all the other patterns & fabric that I had but none of the combinations really felt right.
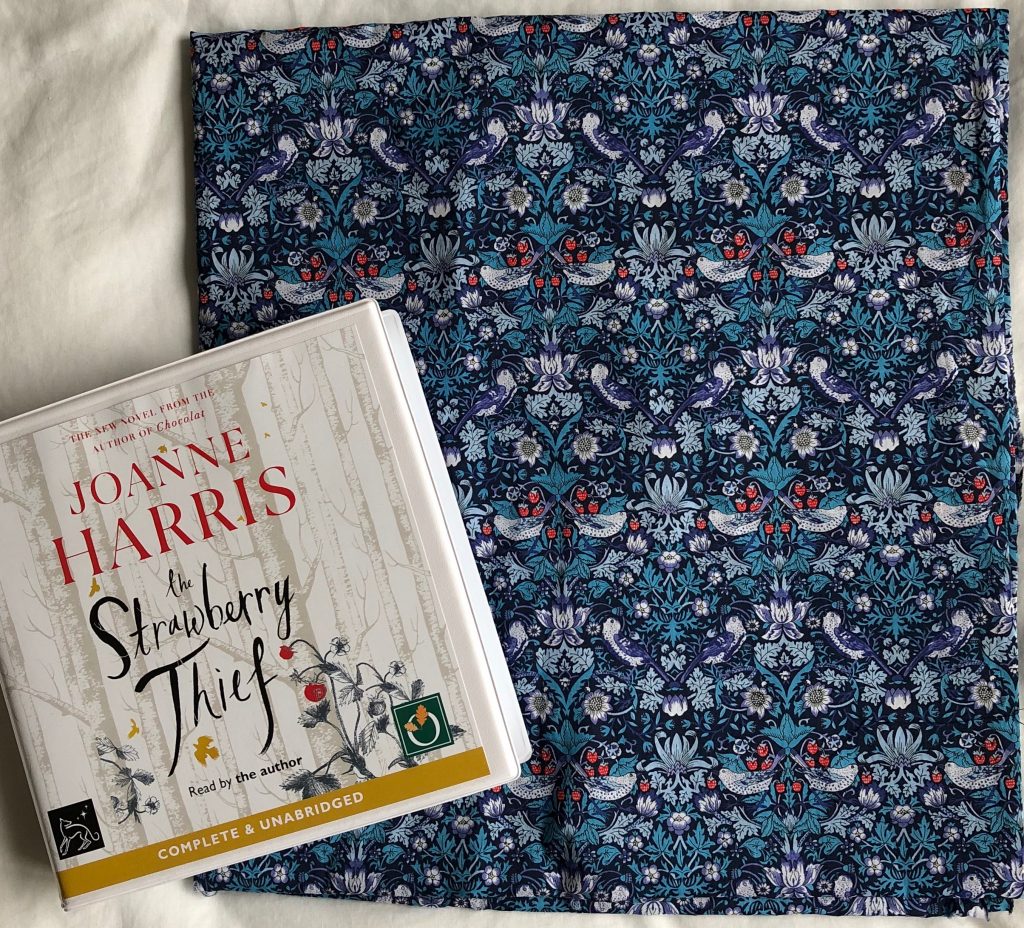
And then I had a brainwave. A couple of years ago my son had bought me 2 metres of a beautiful Liberty Tana lawn called the Strawberry Thief, (a popular William Morris design), which I had never used, chiefly because it’s expensive, at £25 per metre & I could never find a pattern that I liked & was special enough, but what could be more special than his wedding, it would have meaning for both of us. However, it was not that straightforward! Read on…
Fabric Wrangling
The more astute among you may have realised that the Penny dress calls for 3 3/4 yards of 45″ wide fabric & 2 3/4 yards of 60” wide fabric, this Liberty print sits somewhere in between the 2 at 50″, so call it 3 metres & I had 2. I had several attempts at trying to fit the pattern pieces on but it just didn’t seem to work but tenacious is my middle name & I didn’t have much time left – a week to be exact, so I did some fabric wrangling & pattern Tetris & made the bugger fit.
Here’s what I did: I omitted the seam in the back skirt & cut it on the fold. I then graded the front & back skirts from a 12 at the waist down to an 8 at the hem. I then opened out the fabric so that it was no longer folded to cut out the front skirt pieces & lobbed about an inch & half of the length of both. (My toile told me I needed an extra inch in the bodice pieces, so it wouldn’t make the overall finished dress that much shorter & there are 2 inches of hem, so I knew I had plenty to play with).
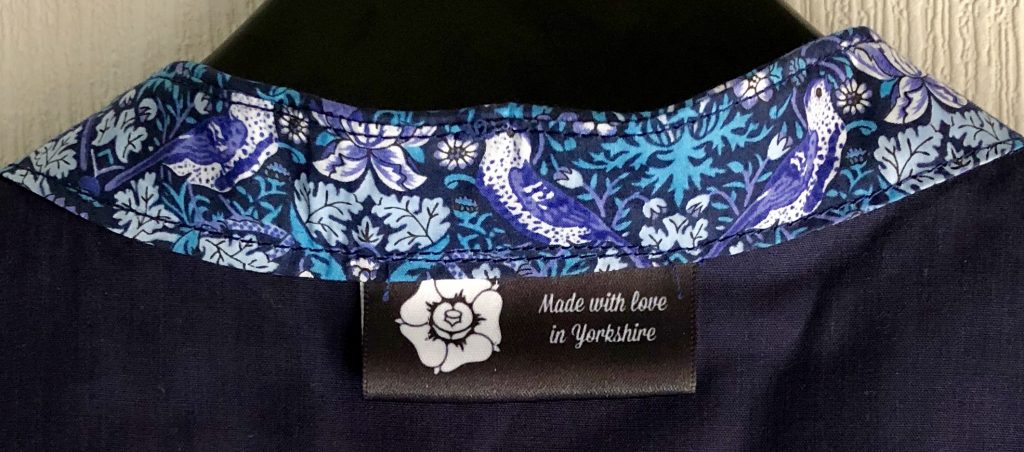
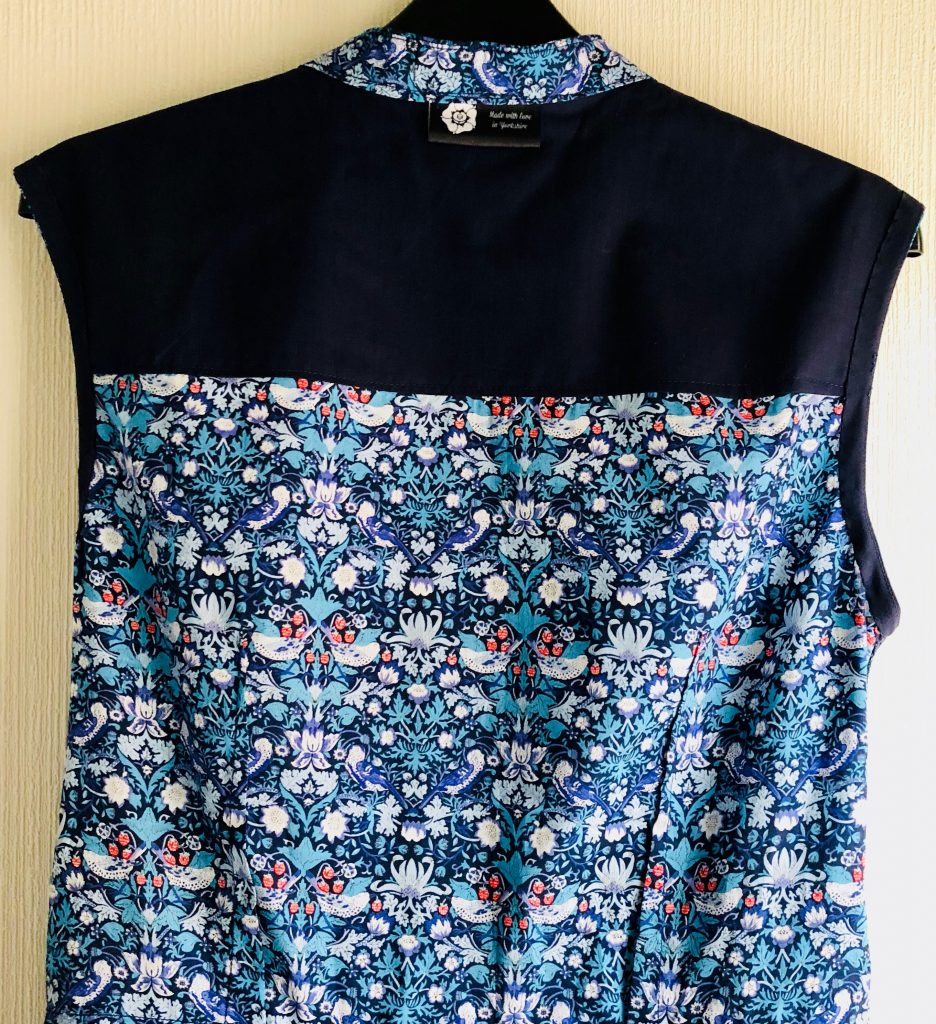
I also cut the inside yoke out of a plain navy fabric & after reading Beccas blog http://redwsews.com where she talks about her struggle with the facings, I decided to heed her advice & use bias binding around the armholes out of the same navy blue cotton that I had used for the yoke. This is a good frugal tip if you are looking to save on expensive fabric. I also ignored the grain line on the top belt piece which instructs you to cut on the bias, it worked out just fine.
Cutting Out
All this faffing about took a long time & it wasn’t without it’s challenges. Firstly, I hadn’t noticed the cutting layout has the fabric wrong side up & this matters! Usually, as long as you are consistent it doesn’t matter which way up your fabric is but because I had tried every which way to fit the pattern on I really didn’t pay attention, which meant that my left skirt became my right skirt & vice versa.
As it turned out I noticed early on & the overall look isn’t affected, so long as you don’t care which way around girls & boys are supposed to button up – I wouldn’t have got away with it on the Great British Sewing Bee but I very much doubt anyone at the wedding will notice, (the bride is a fashion designer, though, so she might but will be too polite & distracted to mention it – I hope). Anyway after much head scratching & trying to fathom my left from my right & actually attaching labels on everything it turned out fine.
Sewing Up
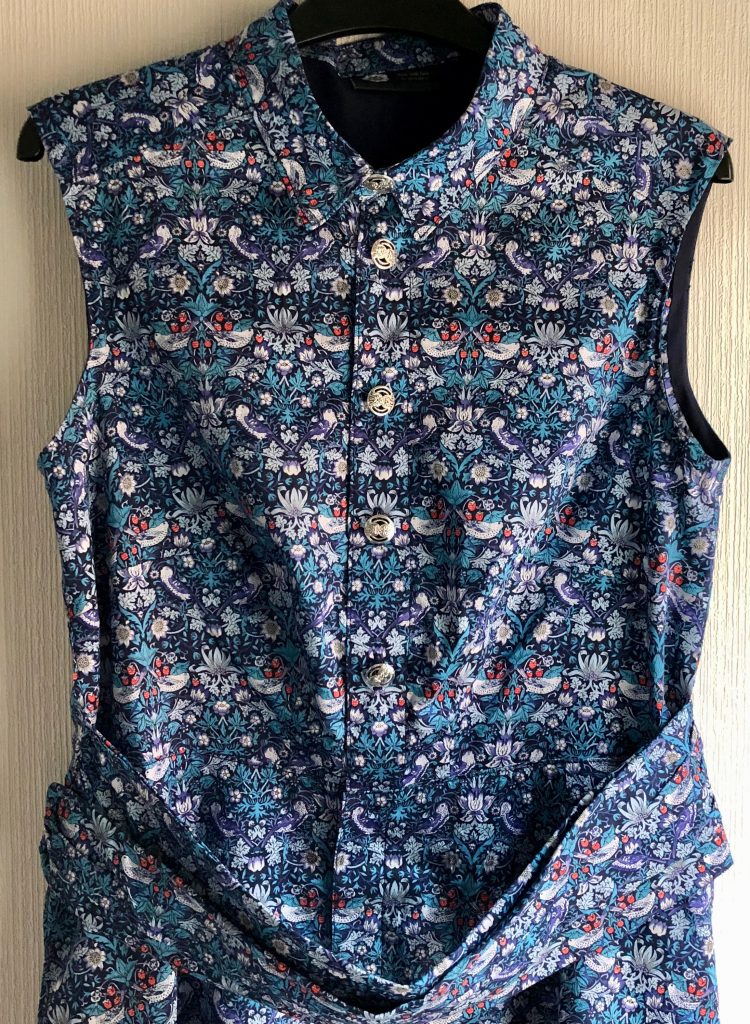
Be warned, this is not a quick sew, at least for me it wasn’t, especially as I decided to hand stitch the bias binding & hem down. Plus there are 5 buttons & buttonholes to do, along with 7 fiddly snaps – boy do I dislike sewing on snaps, they’re tricksy little blighters but I have a top tip for you – use velcro – no just kidding, although I suppose you could. I used wonderweb, which is effectively a soluble double sided sticky tape, (anybody remember Blue Peter – they used tons of it), it stops the little beggers moving about & helps to get the position spot on before sewing in place.
There is also quite a bit of top stitching & edge stitching; along the button placket of both the top & skirt, the back yoke & shoulder seams and also along the top of the skirt, which I did at the front as it helps keep the seam allowances in place & is hidden by the belt but omitted it at the back as I thought it was unnecessary & felt it wouldn’t look right.
You also need to pay particular attention to the belt pieces & make sure that the correct one is shortened, as I was short of fabric, I was reluctant to cut one out & then trim it down to the right size, so I steamed ahead, to my chagrin as I had shortened the wrong one, which meant that I had to add a bit on, luckily it was a bit that went underneath, so no-one knows, except me (& you now!)
Another quirk of this pattern is that you sew the side seams last, I don’t think I have ever done it this way, so the back skirt & front skirt are assembled & then the front skirt is attached to the 2 front bodice pieces & the back is attached to the back skirt, I think that this is because the belt ties are inserted in the side seams between the skirt & bodice. Just a warning before you go steaming ahead & assembling them in the conventional manner. This is a good example of why reading the pattern instructions ahead of time is a good idea. I do think that the side seams could be finished together though.
Finally, the instructions suggest interfacing both the upper collar & the under collar & both of the collar stands, again, I think that is unusual. I’m pretty sure I’ve only interfaced the under collar & inside of the stand before, not both & decided to do so in this instance, the Liberty Tana lawn is soft & I didn’t want to change the integrity of the fabric. That’s the beauty of sewing your own clothes you can make decisions about the construction & design to make something unique.
Final Thoughts
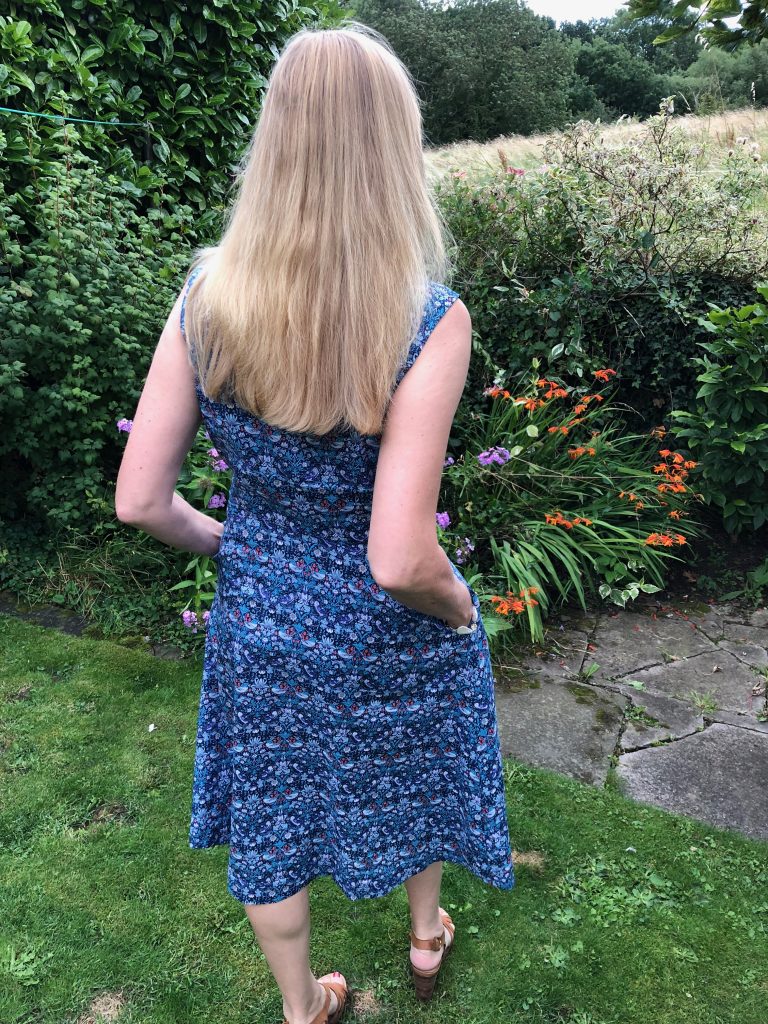
Despite the stumbling blocks with this make, which were entirely of my own doing, I really love the result. I feel that the belt detail is a little lost in the pictures.
Although it’s probably not what the mother of the groom would normally wear, it is definitely me & comfortable & this was not to be a traditional wedding celebration. The ceremony was to be held on Brimham rocks which can be bleak & involved a certain amount of walking in pouring rain as it turned out! But I have a dress that has been made with love from fabric that has meaning to us both & I will be able to wear it for other occasions – in fact I intend to wear it to an interview next week – wish me luck!