I won the Ilford Jacket pattern from an Instagram challenge run by @SewOver50 celebrating their 20k followers prize, I was nominated by Lisa we & both got to choose a pattern each. See below for a full review on my YouTube channel plus a little homage to Sew Over 50.
Click for the video – there’s a time stamp if you want to go straight to the review
Design Details
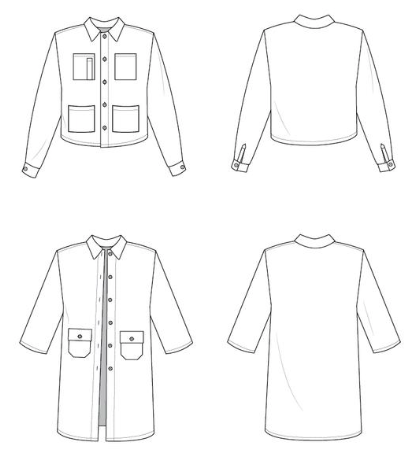
This is a unisex pattern with a ‘choose your own adventure’ set of options: – 2 sleeve types, one including cuffs & a placket, 2 lengths, a multitude of pocket options & a dropped shoulder. It can be worn as a jacket or a shirt, it has some very simple design lines, so a good opportunity to show off some special fabric.
It does say that it can be customised a million different ways, which may be a slight exaggeration but with all those pocket options, it certainly has a lot! There are some templates included to play around with the different elements, so that you can visualise your finished jacket & if you’re more creative than me you could even use some of your fabric or colour it in to really get an idea of how the finished garment will look. I decided that I wanted to do a contrast placket & under collar & inside cuff just to play around a bit.
The hardest part is deciding which features to have. The upper & lower pockets are different widths, so that fit on the chest without going under the armpit & the placements aren’t marked so you can essentially put them where you like or design your own. The good thing about patch pockets is that if you decide that you want to add some later you can or if you put them on & don’t like them you can remove them.
I quite like that the designer is giving you permission almost to play around with the design, it’s so simple & basic really & of course we can do this with any pattern it’s our choice to add or deduct elements but sometimes we forget!

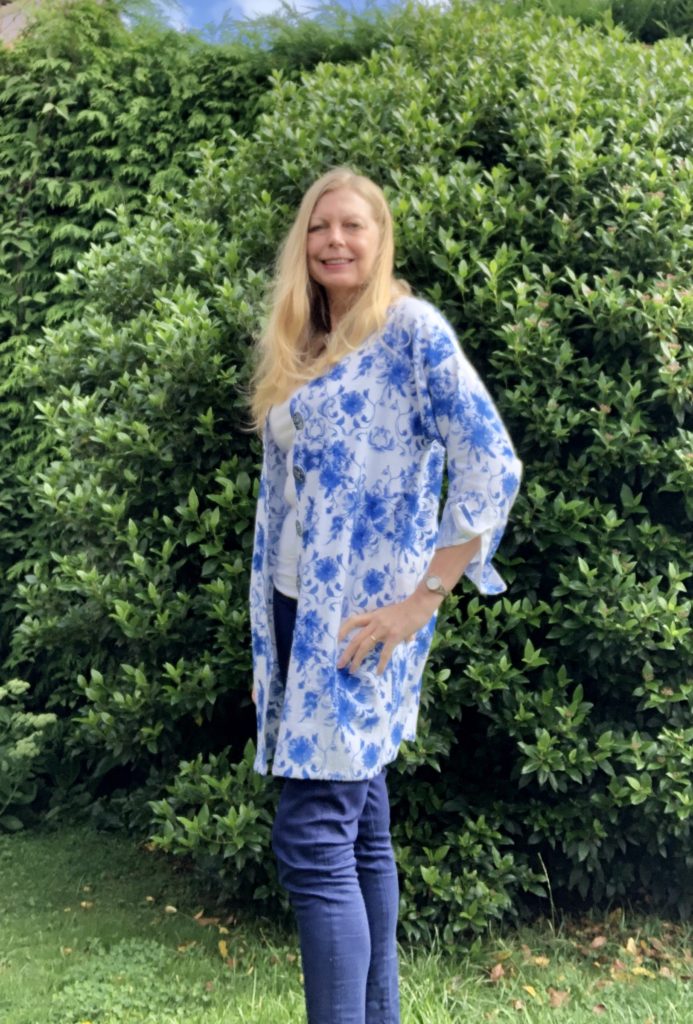
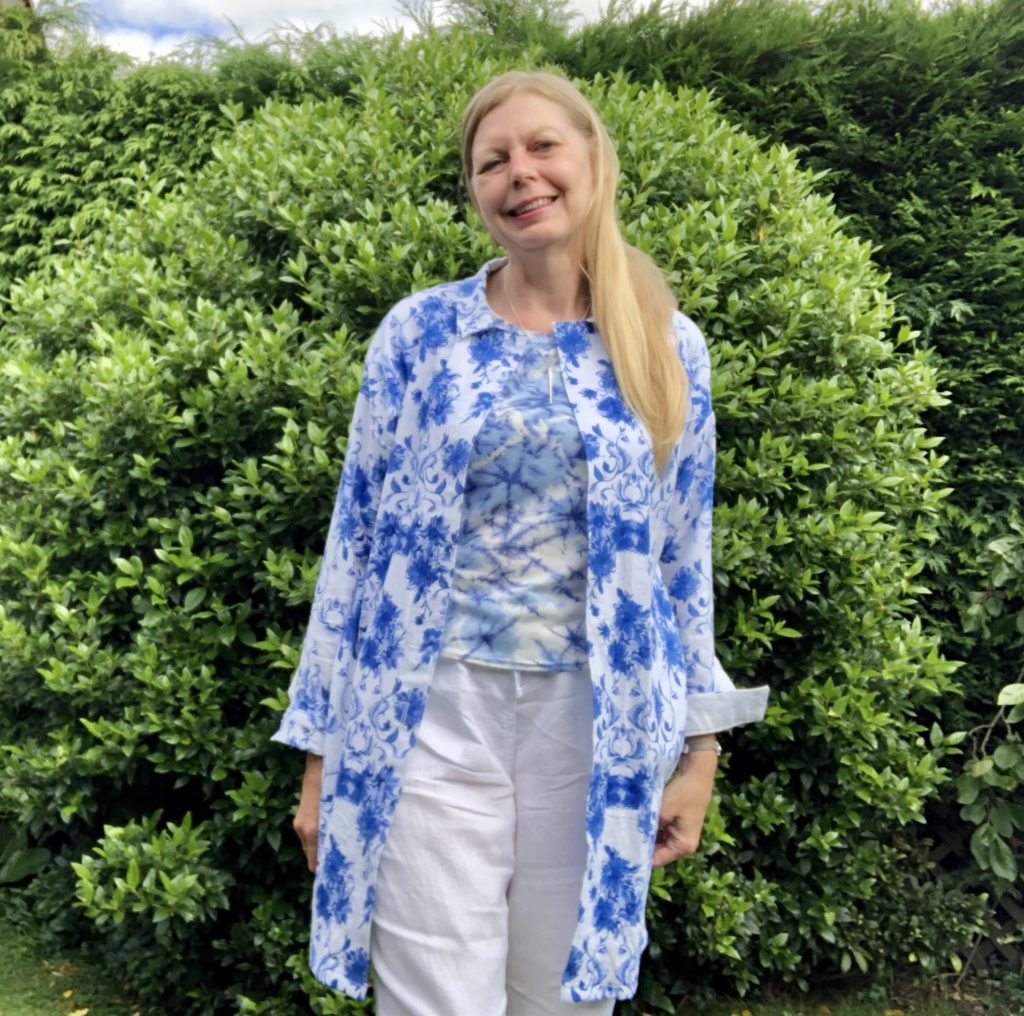
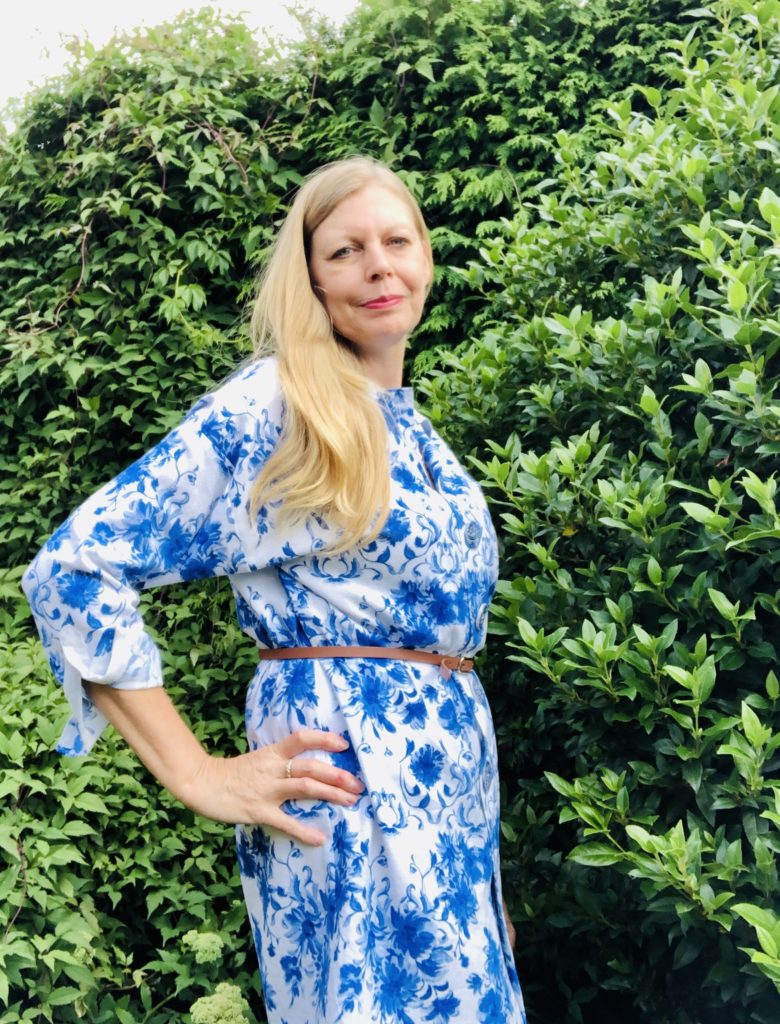
After scrolling through Instagram I was inspired by a couple of variations that had been made into a shirtdress or a loose fitting over shirt & for that reason decided to leave the pockets off, so that it it would look less like a coat.
Skill Level
It’s aimed at a confident beginner & I’d say that’s about right – It’s a great skill builder, as if you’re new to shirt making the collar doesn’t have a stand, so is relatively simple to install & you can opt for the boxy sleeve if you’re not quite ready for plackets.
There are buttons & buttonholes, if it’s your 1st time doing this, please see my video on day 17 of 100 days of sewing, which talks you through sewing buttonholes, along with some trouble shooting if you run into difficulty & I’ve also got another video with a nifty tip to sew on buttons with your machine or alternatively you could easily do snaps. But otherwise a very straightforward make.
Fabric
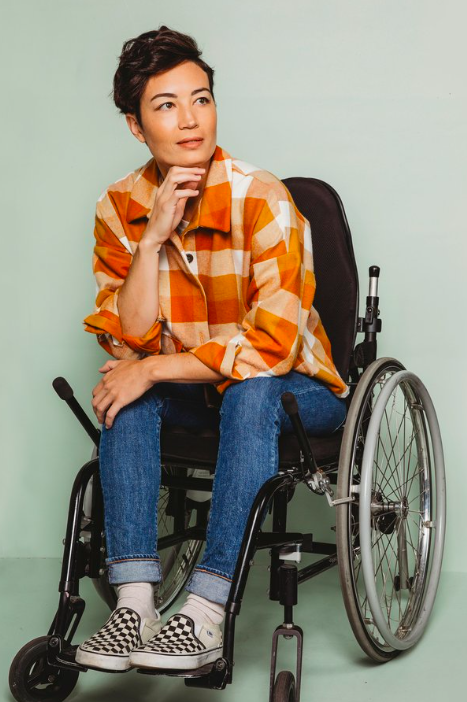
It’s designed for woven fabrics & depending on what fabric you choose will give you a different look, so can be made from anything from a lightweight canvas, denim/cord for a boxy look to a lightweight woven to give it a duster coat feel or even a flannel to give it more of a shirt feel.
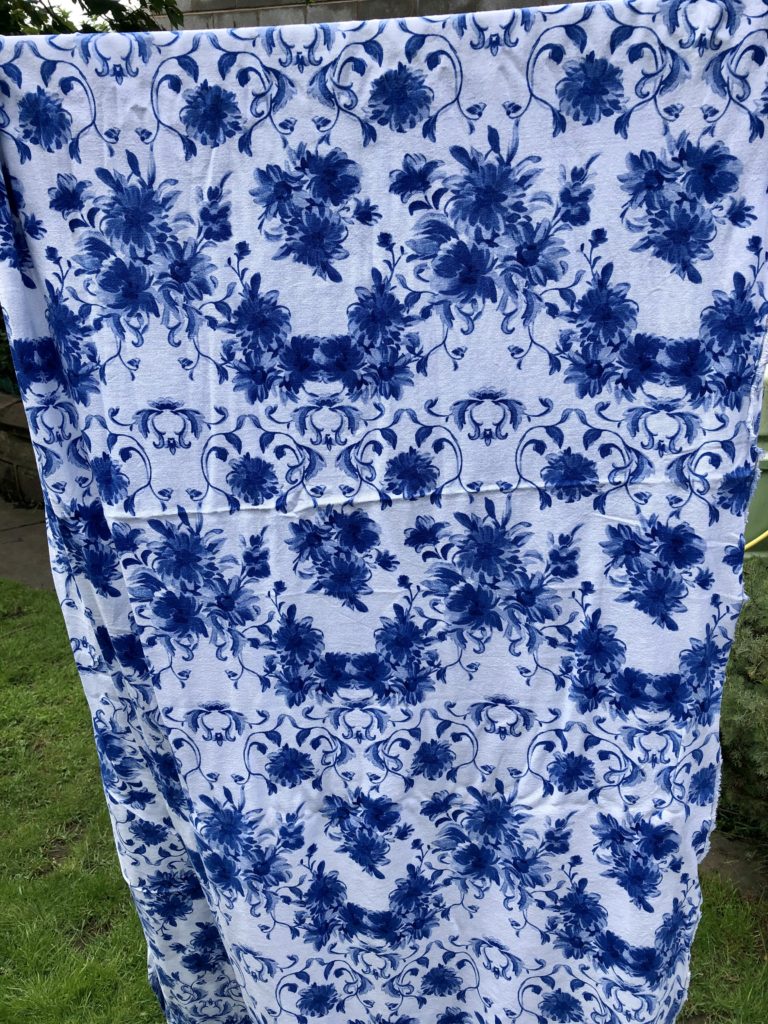
I’d bought the fabric last year with the intention of making the Colette Penny dress for my son’s wedding celebration but just felt that the fabric was a bit too heavy for what I wanted – the dangers of buying online! Although it was from Fabworks, which is local to me I did a click & collect order for it, so hadn’t actually felt the fabric before buying it & there’s nowt like fettling fabric before you buy it. It’s a Linen & viscose mix which is lovely & doesn’t crease as much as a linen does. (I’m afraid there isn’t any of it left now).
I made the longer jacket & the suggested amount required is from 2.5 to 3 metres of fabric depending on width & size but I only used around 1.5 metres for the medium, however, I didn’t have any pockets, (my fabric was only 140 cm wide ). The shorter jacket requires 1.6 to 2.4 metres (all the fabric requirements & measurements are on the website).
It does warn you that you may need extra fabric for an obvious repeat, so I would just test out on some fabric that you may already have first. Other than fabric & thread, you’ll need some interfacing & buttons between 5 & 10 – 1 to 1.5” in diameter depending whichever length that you choose & whether or n to you include cuffs.
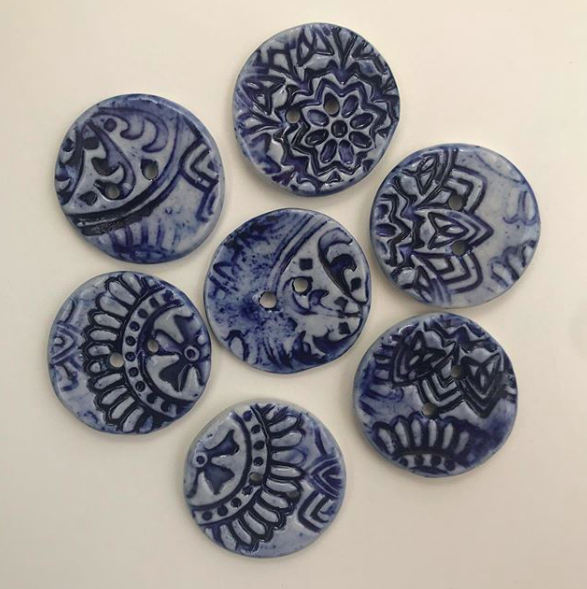
Our Instagram pal Jayne then asked Lisa & I if she could make us some buttons for our jackets, so it has been a true celebration of some friendships borne online & everything that can be good about social media. I talk more about that in the video, but here are the buttons that she made – aren’t they beautiful!
Sizing
Drafted for someone who is 5’6 & B cup & designed to be boxy – NOT fitted, so the advise is to base your size on our bust (or chest since it’s unisex ) & hips. There’s lots of advise about sizing including comparing the finished measurements against something that you like the fit of & deciding from there whether you want to size up or down – in theory I should have made a medium for my bust of 37” & hip with my hips & waist nearer to the large size but decided to opt for the small, as there was so much ease, I really don’t like to be swamped in fabric & added a small amount of length to the arms.
Sizing runs from XS to 4X, which translates as from 32” bust up to 54” & 34” – 57 “ hips with a finished measurement for both hips & bust of 44” – 68” so a good 14” of ease around the bust on the biggest size. You do need extra wearing ease on something that is going to be worn as a jacket in case you need to wear a jumper ( aka a sweater) underneath. But since the bust & hips have similar measurements you can see this is what is meant by boxy, there’s no finished waist measurements given as it doesn’t come in at the waist at all.
Once you’ve determined your size the pattern is in layers so you can just print off the pieces that you need. I just cut straight into the pattern as I’m not a massive fan of tracing & will avoid it if possible, particularly on something as loose fitting as this, where I can be fairly confident that it will fit. It comes as an A0 too for those of you who don’t like all the sticking together of PDFs, oddly I don’t mind that – I pour myself a glass of wine & stick on a YouTube video & away I go. Its also available in print, for the PDF sticking together haters!
Instructions & Sewing Up
The sleeves are sewn in on the flat, so no faffing about easing them in & then you sew up your side seams & sleeves all in 1 pass. The collar is added & then the front button bands are just folded over. If you’re making the sleeve with a cuff that is added on to the end of the sleeve as a first step. You then add whatever pockets that you choose, then hemming, buttonholes & buttons. The designer leaves it up to you to decide which side that you place your buttonholes, as this is unisex, I chose to put mine on the right hand side, as that’s what I’m used to & know I’ll find it annoying if they’re not on the side I’m expecting!
For finishing, if you don’t have an overlocker, it would be relatively easy to do French seams on this on the lighter weight fabrics but I wouldn’t want to do it on a cord or denim, maybe lighter weight chambray would be fine or a viscose, I have a quick tutorial for French Seams if you’ve never done them before, they’re not as difficult as you might think & give a lovely finish inside.
Final Thoughts
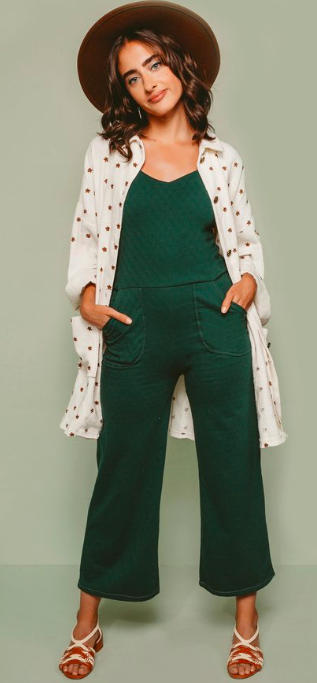
So overall, I like the pattern, the instructions are clear the design is very simple but great for someone wanting to improve their skills & try some of the techniques for the first time. Different fabrics will make for a very different garment, I just need to find some ways of styling this, I think it would be nice over the top of a fitted dress, with a belt as a shirt dress or just with jeans & a plain vest T-shirt. It would be good for summer evenings as a light jacket too.